
What's on this page
- Before you start: what to gather
- Step 1: Check if your home is a good fit
- Step 2: Analyze your electricity usage and size the system
- Step 3: Understand the costs and incentives
- Step 4: Decide between buying, a loan, and a lease or PPA
- Step 5: Get and compare multiple installer quotes
- Step 6: Understand permitting, net metering, and interconnection
- Step 7: Installation, inspection, and turn-on
- How to install solar panels: what installation day looks like
- A worked example: one home going solar end to end
- Where your solar project money goes
- How much effort each step really takes
- Can you go solar for free?
- Common mistakes when going solar
- Troubleshooting: tricky situations
- Your go-solar checklist
- What a home solar array actually consists of
- The bottom line
Short answer: How to go solar comes down to a seven-step sequence: check that your home is a good fit, size the system from a full year of bills, understand the gross cost, choose how to pay, compare several installer quotes on price per watt, clear permitting and your utility's interconnection and net metering rules, then install, inspect and switch on. Active time is a handful of hours; the calendar runs an illustrative two to four months.
Solar panel installation comes down to a short sequence of smaller decisions rather than one big leap, which is why how to go solar is really a question of order, and homeowners who treat it as a single decision are the ones who overpay or end up with a system that does not fit their roof or their bill. The good news is that the sequence is predictable. Every home that installs rooftop solar moves through the same seven steps in the same order, from a quick fit check through to the day the utility grants permission to switch the system on. By the end of this field guide you will know exactly what each step asks of you, what number it produces, and where the common traps hide, so you can walk into the process able to check a salesperson’s arithmetic instead of trusting it.
This field guide covers the whole path in order: confirm your home is a good fit, analyze your usage and size the array, understand the costs and any incentives, choose how you will pay, gather and compare real installer quotes, clear permitting and your utility’s interconnection rules, then install, inspect, and turn the system on. Along the way we link the deeper references you will want at each stage, including our solar sizing field guide, the solar cost briefing, and the payback field guide. Drop your own bill into the companion calculator as you read, because most of these steps turn on numbers only you have.
Key takeaways
- Going solar is a seven-step sequence: fit check, size, cost, financing, quotes, permitting and net metering, then install and turn-on. Each step feeds the next.
- Your active time is short, often just a handful of hours, but the calendar runs long: an illustrative two to four months from first quote to switch-on.
- The single most valuable move is getting several quotes and comparing them on system size in kilowatts and price per watt, not on the headline dollar total.
- There is no federal residential clean energy credit on a home system installed now. Section 25D was terminated by Public Law 119-21, so every price and payback here is a gross figure.
- Net metering rules, roof condition, and ownership type quietly decide more of your outcome than the panel brand does.
Before you start: what to gather
This field guide is a decision process, not a construction manual, so the tools are simple: your bills, a rough picture of your roof, and an honest read of how long you plan to stay in the home. The active work spread across all seven steps adds up to only a handful of hours, but the numbers you feed in decide everything downstream, so it is worth collecting them before you begin. Guessing at any one of them produces a confident plan that is quietly wrong.
Gather these before Step 1:
- Twelve months of electricity bills, or a single statement that shows a rolling twelve-month total. You want annual kilowatt-hours, not dollars, because rates drift but your energy use is what the array has to replace.
- A rough sense of your roof: which directions the main planes face, roughly how old the roof covering is, how much clear area it has, and whether trees or a neighbor’s roofline throw shade across the day.
- Confirmation that you own the home, since rooftop solar is an install on a roof you control. Renters have different paths, covered in troubleshooting.
- An honest sense of your timeline, meaning how many years you expect to stay, because solar rewards owners who hold past the break-even point.
Difficulty is low and the math is arithmetic, not engineering, with the companion calculator doing the multiplication for you. What matters is honest inputs. A wrong usage figure, or a quote that still deducts a federal credit that no longer exists, will produce a plan that looks precise and is simply off. With those four things ready, the seven steps below turn them into a fit verdict, a system size, a budget, a financing choice, a set of comparable quotes, a permitting path, and finally a working array, in that order.
Step 1: Check if your home is a good fit
Start before you talk to anyone selling a system, because the first honest question is whether your home suits solar at all. Four factors decide fit: ownership, roof condition, orientation, and shade. Confirm you own the home and the roof, since a rooftop install is a permanent modification a renter cannot authorize. Then look at the roof covering itself. If your shingles are within a few years of replacement, it is far cheaper to reroof before panels go on than to pay a crew to remove and reset an array later, so a tired roof is a reason to plan repairs first, not to abandon the idea.
Next, orientation and shade. In the northern hemisphere a roof plane facing roughly south is the premium spot, with east and west giving up something like 10 to 20 percent of production, and north-facing planes usually skipped. Walk your property and note where trees, chimneys, or a neighbor’s taller roofline throw shadows across the day, especially in the midday hours when the sun does its heaviest work. Heavy, permanent shade is the single most common reason a roof underperforms, and it may call for a per-panel shade study later.
Finally, get a rough read on your region’s sun. The sunny southwest averages more usable sun than the cloudy north, and while that does not disqualify anyone, it does change how large an array you need. Watch out for treating a marginal roof as a full-fit roof; forcing a full-offset system onto a shaded or wrong-facing roof leads to disappointment. If your roof is small, shaded, or wrong-facing, note it now and carry that limit into sizing, where our solar sizing field guide shows how to adjust. A good-fit home is sturdy, sunny, mostly south-facing, and yours.

Step 2: Analyze your electricity usage and size the system
With fit confirmed, size the array from the one place the energy actually is: your bills. The number that drives everything is your annual electricity use in kilowatt-hours, printed on the statements you already receive. Add up twelve consecutive months and you have the figure the sizing formula needs. Do this with a full year, never a single month, because summer air conditioning or winter electric heat can make one month double another, and multiplying a single bill by twelve is the most common way people misjudge their own usage. A typical single-family home lands somewhere between 8,000 and 12,000 kilowatt-hours a year.
Now turn usage into a system size. The clean formula is your target annual kilowatt-hours, divided by your daily peak sun hours, divided by 365, divided by an efficiency factor near 0.85. Your target is your annual usage times the share of the bill you want to cover, so a 90 percent offset uses nine-tenths of your usage. As an illustrative run, a 10,800 kilowatt-hour home at an average 4.5 peak sun hours and a 90 percent offset works out to roughly a 7 kilowatt system, which at 400 watt panels is about 18 panels. Our solar sizing field guide walks this formula in full, and the companion calculator runs the division live.
Watch out for two sizing traps. First, do not size from square footage; floor area barely predicts electricity use, and a compact all-electric home can outuse a large one on gas. Second, if you plan to add an electric vehicle or a heat pump within a few years, your past bills understate your future usage, so size to tomorrow’s bill, not today’s. If you want the count worked from the other direction, our note on how many solar panels you need starts from the panel rather than the kilowatt. Carry one number into Step 3: a defensible system size in kilowatts.
Step 3: Understand the costs and incentives
A system size in kilowatts becomes a budget through one number installers use: price per watt, the fully installed cost divided by the system’s wattage. Quoting per watt lets you compare systems built from different panel sizes on equal footing. Installed residential prices commonly fall in an illustrative range around 2.50 to 3.50 dollars per watt gross, though your region, roof complexity, and equipment tier move it. Run the arithmetic on your own size: a 7 kilowatt system is 7,000 watts, so at an illustrative 2.90 dollars per watt it prices near 20,300 dollars, and that is the whole number rather than an after-credit one. Our solar cost briefing breaks down why identical equipment can differ by thousands between quotes.
Hardware is only a fraction of that total. The panels and inverter are commonly around a third of the bill, and the rest is labor, permitting, sales, design, and company margin, which is exactly why two quotes for the same equipment can land far apart. Understanding that split, shown in the chart later in this field guide, is what lets you push back on a high bid without assuming the crew is cutting corners.
Then there is the incentive question, and the federal part of it is settled. The federal Residential Clean Energy Credit under Internal Revenue Code section 25D was terminated by Public Law 119-21, and per the IRS’s Residential Clean Energy Credit page it is not available for any property placed in service after December 31, 2025. The operative test is when the original installation was completed, not when the system was ordered, contracted, or paid for, so a contract signed in an earlier year does not rescue an array commissioned now. Price your project gross, because there is no federal line to subtract from it. Watch out for the stale quote you are most likely to meet: a proposal or an online estimator that still deducts 30 percent is working from superseded rules, and you should ask for the bid to be re-quoted gross before you compare it against anything. Our solar tax credit briefing is the full explanation. State, local, and utility programs are a separate question that turns entirely on where you live, so take that one to your own utility and your state energy office, and take your own tax position to a qualified tax professional.
Step 4: Decide between buying, a loan, and a lease or PPA
How you pay changes the economics as much as what you buy, and there are three broad paths. Buying with cash produces the strongest lifetime result: you own the system outright, you keep any state or utility incentive you personally qualify for (the DSIRE database run by NC State lists them by state), and you pay no interest, so every kilowatt-hour the panels make after payback is close to free. The cost is the up-front outlay, which for the illustrative 20,300 dollar system above is real money to part with at once. Cash suits owners who have the funds, and with no federal credit in the arithmetic on either side, the comparison is simply gross price against interest.
A solar loan spreads that cost over years while usually keeping ownership in your name, which means any state or utility incentive you qualify for stays yours. The trade is interest, which raises the effective total and lengthens payback, and some low-rate solar loans carry fees baked into a higher system price, so read the real cost, not just the monthly payment. A loan suits owners who want the ownership economics without the lump sum.
A lease or power purchase agreement, often marketed as no money down, is structurally different: the company owns the panels, so any state or utility incentive goes to the company, and you either rent the equipment or buy its power at a set rate. Many of these contracts include an annual escalator that raises what you pay every year, sometimes at a pace that overtakes utility rates, and the contract must transfer to any future buyer of your home, which can complicate a sale. Watch out for signing a lease without modeling the escalator across the full term. Ownership generally builds more value, which our note on whether solar increases home value explains. Run each path through the companion calculator before you choose.
Step 5: Get and compare multiple installer quotes
This is where your effort should concentrate, because comparison is the single highest-value move in the whole process, and the most skipped. Get at least three quotes, and never sign the first one, since prices for the same system routinely vary by thousands between local installers. The trap is comparing headline dollar totals, which hides everything. Instead, normalize every quote to two figures: the system size in kilowatts and the price per watt. A 24,000 dollar bid for a 9 kilowatt system and a 21,000 dollar bid for a 7 kilowatt system are not the cheaper-and-dearer pair they appear to be until you divide by wattage.
Compare like with like across quotes. Line up the panel wattage and brand, the inverter type, the production estimate in annual kilowatt-hours, and the warranty terms on panels, inverter, and workmanship. A quote that promises more production from fewer or smaller panels deserves scrutiny, and a much cheaper bid that swaps a premium inverter for a budget one is not really cheaper for the same thing. Our solar cost briefing details which line items actually move the total.
Then vet the installer, not just the price. Confirm the company is properly licensed for electrical work in your state, check that it carries insurance, and read independent reviews for patterns around no-shows, warranty claims, and follow-up service, since the crew you hire will be responsible for your roof for years. Watch out for high-pressure tactics, a discount that vanishes if you do not sign today, or a quote that still subtracts a 30 percent federal credit to make the math work, since that credit no longer exists. A reputable installer will give you time, put the production estimate and warranty in writing, and welcome the comparison. Our field guide on how to choose a solar installer turns this vetting into a checklist you can run in an afternoon. Take the strongest apples-to-apples quote into Step 6.

Step 6: Understand permitting, net metering, and interconnection
Once you have chosen an installer, the project enters a paperwork stretch that the installer largely runs but that you should understand, because its rules shape your design and your savings. Three things happen here: your city or county issues a building and electrical permit, your utility approves the system to connect to the grid through an interconnection agreement, and your net-metering terms are set. A reputable installer handles the permit and interconnection filings, but timelines depend on local backlogs and utility queues, which is why this stage often accounts for much of the two-to-four-month calendar even though your own effort is small.
Net metering deserves your attention as a design input, not an afterthought. It is the billing arrangement that credits you for surplus electricity your panels export at midday, which you draw back at night. A program that credits exports at the full retail rate is far more valuable than one paying a low wholesale rate or capping how much you can offset, and these rules vary by state and utility and have been changing in many places, as the Department of Energy’s Homeowner’s Guide to Going Solar also notes. Confirm your specific program before you finalize size, because sizing past what your utility will credit wastes money on panels that export for pennies. Watch out for a design that assumes generous net metering your utility no longer offers.
Interconnection also sets practical limits. Some utilities cap system size relative to your usage, require specific equipment, or impose fees, and a few have interconnection queues that add weeks. Where net metering pays little for exports, a battery starts to make more sense, since it lets you store your own midday surplus instead of selling it cheaply, a case our note on whether solar batteries are worth it works through. If you go that route, our Powerwall 3 cost briefing prices what the battery actually costs installed. Confirm the permit is pulled, the interconnection agreement is signed, and the net-metering terms are in writing before the crew arrives, so no surprise rule shrinks the value of the array you are about to install.
Step 7: Installation, inspection, and turn-on
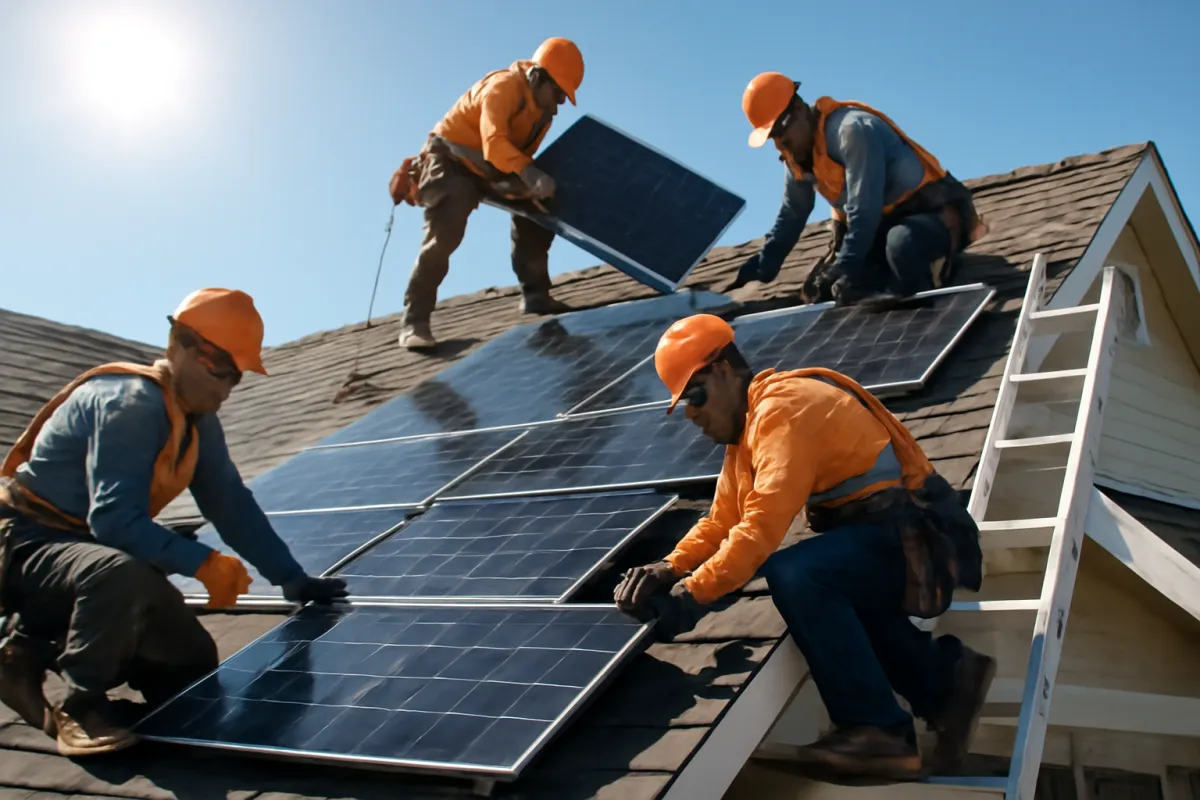
The physical install is the shortest and most visible step, and by now most of the hard decisions are behind you. For a typical home the crew mounts the racking, attaches the panels, wires the array to an inverter and your main electrical panel, and installs any monitoring, usually across one to three days on the roof. You do not need to be on the roof, but plan to be home for access and to walk the finished work. A clean install leaves tidy conduit runs, sealed roof penetrations, and labeled equipment, and the crew should show you the inverter, any battery, and the monitoring app before they leave. Workmanship is also a safety matter, because the rare rooftop fires that do occur trace mostly to rushed wiring and poorly seated connectors rather than the panels themselves, a risk our note on whether solar panels can catch fire puts in honest perspective.
Installation is not the finish line, because two approvals still stand between you and switch-on. First, a local building or electrical inspector visits to confirm the work meets code, checking the mounting, wiring, grounding, and labeling. If something fails, the installer corrects it and the inspector returns, which can add days. Second, and often the longest single wait, your utility must grant permission to operate, the formal sign-off that lets you legally energize the system and start net metering. Watch out for assuming you can turn the array on the day it is installed; running it before permission to operate can violate your interconnection agreement.
Once permission to operate arrives, you switch the system on and it begins producing. Set up the monitoring so you can confirm the array is generating in line with the written production estimate from your quote, and check it over the first few weeks and seasons, since output naturally rises in summer and falls in winter. If production runs well below the estimate, raise it with your installer while the workmanship warranty is fresh. From here the system is low maintenance: panels have no moving parts and are largely cleaned by rain, and the inverter is the component most likely to need attention years down the line. Compare your real output against the payback field guide to track your break-even.

How to install solar panels: what installation day looks like
Homeowners searching how to install solar panels are usually asking one of two questions, and the answers point in opposite directions. If you want to know what the crew will actually do on your roof, the sequence below is what to expect. If you are asking whether to do the work yourself, the plain answer for a grid-tied rooftop system is no. Mounting an array and tying it into your main service panel and the utility grid is licensed electrical and structural work in nearly every jurisdiction, it has to pass a building or electrical inspection, and your utility will not issue an interconnection agreement or permission to operate for an unpermitted install. A self-install also tends to void roof and equipment warranties and puts every roof penetration on you. This section is therefore a description of solar panel installation, not a set of wiring instructions, because knowing what good work looks like is how you spot the crew that rushed it.
The physical work runs in a consistent order. The crew starts on the ground, staging panels and rails and reviewing the approved plan set, then goes up to mark the layout and locate the rafters, since every mounting point must land in structure rather than sheathing. Mounting feet go down next, each one flashed and sealed where it passes through the roof covering, and this is the step that most determines whether your roof leaks in five years. Rails bolt across the feet, panels clamp onto the rails in the planned rows, and the electrical work follows: microinverters or optimizers at the modules if the design uses them, conduit and wire runs down the roof and along the exterior wall, then the inverter mounted near your service equipment. The tie-in comes last, with the disconnects, rapid-shutdown hardware, grounding, and labeling your local code requires, plus a main-panel upgrade if the existing panel cannot carry the array. For a typical home this is one to three days, weather permitting.
You do not need to be on the roof, but there is real value in being home and paying attention. Look for penetrations that are properly flashed rather than smeared with sealant, conduit runs that are straight and secured, tidy labeling at the disconnects, and debris and old packaging cleared at the end of each day. Ask the lead which panels and inverter went in and confirm they match the contract, and have the crew walk you through the inverter, any battery, the shutoffs, and the monitoring app before they leave. Then remember that installation day is not turn-on day: the inspection and your utility’s permission to operate still come after, as Step 7 describes. All of this is routine when a properly licensed and insured company does it, which is exactly why our field guide on how to choose a solar panel installer treats licensing, insurance, and the workmanship warranty as pass-or-fail checks rather than nice-to-haves.
A worked example: one home going solar end to end
Take one household through all seven steps. The Ramirez family owns a single-story home with a sound, roughly south-facing asphalt roof and only light morning shade from a neighbor’s tree, so Step 1 clears them as a good fit. In Step 2 they add up a full year of bills to 10,800 kilowatt-hours, choose a 90 percent offset, and at an average 4.5 peak sun hours the formula gives roughly a 7 kilowatt system, about 18 panels at 400 watts. That is their defensible size, carried forward.
Step 3 prices it. At an illustrative 2.90 dollars per watt, the 7,000 watt system runs near 20,300 dollars, and that is the whole price. Their electricity costs about 0.17 dollars per kilowatt-hour, so their annual bill is near 1,836 dollars, and a 90 percent offset would keep roughly 1,650 dollars a year out of the utility’s hands. There is no federal residential credit to net off that price, because section 25D was terminated by Public Law 119-21 and does not apply to property placed in service after December 31, 2025, so 20,300 dollars is the figure they plan around. In Step 4 they compare paying cash against a loan and a lease, and choose to buy, keeping ownership and any state or utility incentive they qualify for.
Steps 5 through 7 finish the job. They gather three quotes, normalize each to kilowatts and price per watt, and pick a licensed installer whose written production estimate and warranties are strongest, not whose headline total is lowest. Permitting and interconnection take several weeks, the install runs two days, inspection passes, and utility permission to operate arrives a few weeks later. On the full 20,300 dollar gross cost, 1,650 dollars a year in savings puts simple payback near 12.3 years, because 20,300 divided by 1,650 is 12.3. Nothing shortens that, since there is no federal credit to subtract, so if a salesperson hands them a 14,200 dollar net price and an 8.6 year payback, that proposal is built on the terminated 30 percent credit and should be re-quoted gross. Every number here is illustrative; run your own in the companion calculator.
Where your solar project money goes
One reason quotes vary so much is that hardware is a minority of the bill, so it helps to see where a solar dollar actually goes across the whole project. The panels and inverter are commonly around a third of an installed price, and the rest is people and process: the labor to mount and wire the array, the permitting and inspection and utility interconnection, the sales and design and company overhead, and the electrical work like wiring and a possible main-panel upgrade. Two crews can pay very different amounts for the same panels once labor rates and margin diverge.
Where your solar project money goes
Illustrative share of a fully installed residential price. Sums to 100%.
Illustrative shares of an installed price, not a quote. Because hardware is barely a third of the total, two bids for identical panels can differ by thousands on labor, margin, and electrical work, which is why comparing quotes in Step 5 pays off.
The takeaway is not that margin is unfair; a licensed crew that stands behind your roof for years earns its overhead. The takeaway is that price is negotiable in the parts that are not hardware, and that a bid far below the pack usually cut something real, whether a premium inverter, a proper production estimate, or the workmanship warranty. Read the split before you read the total.
How much effort each step really takes
It also helps to see where your own time goes, because the seven steps are wildly uneven in the attention they demand from you. The early fit and sizing steps are quick reading, the financing choice takes some deliberation, and the quote comparison is where your hours should pile up, since that is the step that most changes your outcome. Permitting, install, and turn-on run long on the calendar but ask little of you, because the installer and the inspectors do the work while you wait.
How much effort each step really takes
Illustrative hours of your own attention per step, not calendar time. Bars scale to the busiest step.
Bar widths track each step's illustrative hours against the 10-hour quote-comparison step (2 of 10 is 20%, 3 of 10 is 30%, 4 of 10 is 40%, 10 of 10 is 100%). The lesson: put your time into comparing quotes, and let the long, low-effort permitting and install stretch run itself.
Read across the bars and the strategy writes itself. The steps that decide your money, usage and sizing, financing, and above all quote comparison, are the cheap ones in hours, so spend real attention there. The steps that eat the calendar, permitting and install, cost you little beyond patience. Homeowners who invert this, rushing the quote comparison to get to install faster, are the ones who overpay for the fastest yes.
Can you go solar for free?
Spend any time researching how to go solar and you will meet the free solar pitch: no money down, no cost to you, the government covers it. The phrase deserves a plain answer because it closes more signatures than any spec sheet does. There is no program, federal, state, or utility, that installs free solar panels on private homes. What the pitch almost always describes is the lease or power purchase agreement from Step 4 wearing better clothes. The company installs and owns the array on your roof, keeps any incentives for itself, and you commit to paying for the equipment or its power every month, commonly for twenty years or more. No money down is real; free is not.
That does not make every no-money-down deal a trap. A fairly priced lease or PPA can beat doing nothing for a household with no cash to deploy and no appetite for a loan, and some households sign one with clear eyes and do fine. The problem is the framing. A deal sold as free discourages exactly the comparison that Steps 4 and 5 exist to force, and the contracts most likely to disappoint, the ones with steep annual escalators, punishing buyout terms, or transfer conditions that complicate a home sale, are the ones that lean hardest on the word. A salesperson pushing free also tends to reach for the other pressure moves you learned to spot in Step 5: the discount that expires tonight and the terminated federal credit still baked in as a sure thing.
So translate the pitch before you judge it. Ask who owns the system, who keeps any incentives, what the monthly payment is in year one and what the escalator makes it by the final year, what the buyout schedule looks like, and what the contract requires of the next owner of your home. Then set that alongside a cash purchase and a loan quote for the same roof and compare lifetime cost, not month-one cost. Treated that way, a no-money-down offer becomes what it actually is, one of the three financing paths, and it either survives the comparison or it does not. Either outcome leaves you deciding on arithmetic instead of a slogan, which is the whole point of running these steps in order.
Common mistakes when going solar
The same handful of errors accounts for most solar regret, and each one is avoidable before you sign anything.
- Getting only one quote. Prices for the same system vary by thousands between installers; comparing at least three on kilowatts and price per watt is the single biggest saving in the process.
- Oversizing past net-metering caps. Where exports pay a low wholesale rate or your utility caps offset, panels beyond your own usage earn little, so size to your usage plus justified future load, not to fill the roof.
- Signing a lease without understanding the escalator. A no-money-down lease can look attractive until an annual escalator raises the payment every year and the contract complicates a future home sale; model the full term first.
- Ignoring roof condition and age. Putting panels on a roof near the end of its life means paying to remove and reset the array at reroof time; if the covering is close to replacement, reroof first.
- Letting a quote subtract a federal tax credit that no longer exists. Section 25D was terminated by Public Law 119-21 and does not apply to property placed in service after December 31, 2025, so a bid, spreadsheet, or estimator still deducting 30 percent is working from superseded rules; ask for the number gross.
- Comparing headline totals instead of like-for-like. A cheaper bid that swaps a premium inverter for a budget one, or promises more from smaller panels, is not the same product; normalize equipment, production estimates, and warranties before you compare price.
Avoid these six and the system you install will be sized to the energy you actually use, priced against real comparison, and paid for in the way that fits your situation, rather than shaped by whoever pushed hardest for a signature.
Troubleshooting: tricky situations
What if your roof is heavily shaded or too small for a full-offset array? This is common on complex or tree-covered roofs. The honest fixes are trimming or removing the offending trees where you can, using higher-wattage panels to pack more production into fewer slots, accepting a partial offset that leaves a modest residual bill, or adding a ground-mount array if you have yard space. Microinverters or power optimizers let each panel work independently so one shaded panel does not drag down a whole string, which can recover output a simpler system would lose. Sizing to what the roof can support is realistic, not a failure.
What if your homeowners association objects to panels? Many states have solar-access provisions that limit how far an HOA can restrict rooftop solar, though the specifics vary widely, so check your state’s rules and your HOA’s guidelines early. Submitting a clean plan that keeps panels off the most street-visible plane where possible, and citing any applicable solar-access protection, resolves most objections. Start this conversation before you sign, not after the crew is scheduled.
What if you rent rather than own? You generally cannot install rooftop solar on a home you do not own, but community solar, where you subscribe to a share of a larger off-site array and receive credit on your bill, is available in many areas and captures some of the benefit without an install. It is also worth a conversation with a landlord who might value the improvement, though that is the exception.
What if your panels would sit on an aging roof? Reroof first. It is far cheaper to replace the covering before the array goes on than to pay a crew to remove and reset panels partway through the roof’s second life. Time the two projects together and you pay the removal cost once, never.
What if your utility changes its net-metering rules after you install? Existing systems are often grandfathered under the terms in place when they were approved, but this is not guaranteed and varies by utility, so confirm your program’s grandfathering policy before you commit. Where future rules look likely to weaken export credits, a battery that stores your own surplus becomes more attractive, a trade our note on whether solar batteries are worth it works through in detail.
Your go-solar checklist
Use this as the save-and-act summary. Work it top to bottom and you will move through all seven steps with your numbers, not a salesperson’s, in hand.
- Confirm you own the home and that the roof is sound, mostly south-facing, and not near the end of its life.
- Add up a full twelve months of kilowatt-hours from your bills, adjusting up for any EV or heat pump you will add soon.
- Size the system: target kWh divided by peak sun hours, by 365, by a 0.85 efficiency factor, then check it against the calculator.
- Price it in dollars per watt, and understand that hardware is only about a third of the total.
- Price the project gross, since there is no federal residential tax credit to subtract, and send back any quote that shows an after-credit number.
- Choose how you will pay: cash, a loan, or a lease or PPA, modeling any lease escalator across the full term.
- Get at least three quotes and compare them on system size in kilowatts, price per watt, equipment, production estimate, and warranty.
- Vet each installer's licensing, insurance, and independent reviews before you sign.
- Confirm the permit, the interconnection agreement, and your net-metering terms in writing before the crew arrives.
- After install, pass inspection, wait for utility permission to operate, then turn the system on and monitor its production by season.
What a home solar array actually consists of
People search for a home solar array expecting a product, and it is closer to a small system of parts that have to suit each other.
The array itself is the panels, mounted on a racking system fixed to the roof or to a ground frame. Array simply means the panels working together as one generating unit.
The inverter converts the direct current the panels produce into the alternating current the house uses. This is either one central string inverter, or microinverters fitted per panel, and the choice affects shading tolerance and monitoring granularity.
Racking and mounting attach the array to the structure and are where roof penetrations and waterproofing happen, which matters more for the life of the roof than most buyers realise.
Monitoring reports what the array is producing, which is the only way you find out a panel or string has stopped.
Optional storage adds a battery so surplus generation can be used later rather than exported.
The sizing question follows from consumption rather than from roof space, which is why our system sizing walkthrough starts from your electricity bill. The panel count guide covers translating that into an array, and solar inverter against battery covers where storage fits.
The bottom line
Going solar is not one intimidating decision but seven ordered steps, and taking them in sequence is what keeps you in control of the outcome. Confirm your home is a good fit, size the array from a full year of bills, understand the cost per watt and the split behind it, choose cash, a loan, or a lease with eyes open, gather and compare several quotes on kilowatts rather than headline totals, clear permitting and pin down your net-metering terms, then install, inspect, and turn on. Your active time is a handful of hours concentrated in the sizing and quoting; the rest is patience while the installer and the inspectors do their part across an illustrative two to four months.
The figures throughout, an illustrative 7 kilowatt system near 20,300 dollars gross, roughly 1,650 dollars a year in savings, and a payback in the low teens of years, are teaching examples, not quotes for your home, and your own bill, roof, sun, and utility will move every one. Above all, price the system gross, because the federal residential credit under section 25D was terminated by Public Law 119-21, and confirm your net-metering terms with your own utility, since those terms quietly decide a large share of your result. Run your own numbers in the companion calculator, read them alongside the solar cost briefing and the payback field guide, and you will go solar on your math, not a salesperson’s.
WattBarn publishes this field guide to help you walk the solar process with your own numbers in hand, not to serve as engineering, tax, or financial advice. The system sizes, dollar figures, price-per-watt ranges, savings, and payback periods above are illustrative examples chosen to teach the seven steps, not quotes or measurements of your home, and your real usage, roof, shading, utility net-metering rules, financing terms, and local codes will produce different numbers that change over time. The federal Residential Clean Energy Credit under section 25D was terminated by Public Law 119-21 and is not available for property placed in service after December 31, 2025, so every figure above is a gross one; state, local, and utility programs vary by where you live, so take those to your own utility or state energy office and your tax position to a qualified tax professional, and let a licensed installer’s on-site assessment and written production estimate, rather than these worked sketches, decide the system you actually buy.
Frequently asked questions
How do I go solar, step by step?
Going solar follows a repeatable order: check that your home is a good fit, pull a year of bills to size the system, understand the costs and any incentives, decide how you will pay, gather several installer quotes, clear permitting and your utility's interconnection, then install and turn the system on. The homeowner's real work sits in the middle, mostly in reading bills and comparing quotes, because the installer handles the physical build and most of the paperwork. As an illustrative timeline, the deciding and quoting can take a few weeks, while permitting, install, and utility approval often stretch the whole project across two to four months. Follow the seven steps in order and each one hands the next the number it needs.
How long does it take to go solar from start to finish?
For a typical grid-tied home, plan on roughly two to four months from your first quote to the day the system is switched on, though it varies widely by region and utility. Your own active time is short, a handful of hours spread across reading bills, comparing quotes, and signing paperwork. Most of the calendar is waiting: permit review at the city, a scheduled install day, an inspection, and then your utility granting permission to operate. The install itself is often just one to three days on the roof. Weather, permit backlogs, and utility interconnection queues are the usual reasons a project runs long, so treat any single quoted timeline as illustrative.
Is it worth it to go solar?
Whether solar is worth it depends on your electricity rate, your sun, your roof, and the price you are quoted, so there is no single yes or no. Solar tends to pay off best where electricity is expensive, the roof faces roughly south with little shade, and you plan to stay in the home long enough to pass the break-even point, commonly landing somewhere in the range of ten to fifteen illustrative years on a gross price, since the federal residential credit under section 25D was terminated by Public Law 119-21 and there is no federal line left to subtract. It tends to disappoint where rates are low, the roof is shaded or complex, or the deal is a lease with a steep escalator. The honest test is to run your own bill, quote, and payback rather than trust a national average, which is exactly what our payback field guide and the companion calculator are for.
Is there still a federal solar tax credit when I go solar?
No, not for a home system being installed now. The federal Residential Clean Energy Credit under Internal Revenue Code section 25D was terminated by Public Law 119-21, and per the IRS it is not available for any property placed in service after December 31, 2025. The operative test is when the original installation was completed, not when you ordered, contracted, or paid for the system, so a deposit or a signed contract from an earlier year does not rescue an array switched on now. Price the project gross: a proposal, spreadsheet, or online estimator still subtracting 30 percent is working from superseded rules and should be re-quoted without it. Our briefing on the solar tax credit explains the change in full, state and utility programs vary so ask your own utility and state energy office about those, and take your own tax position to a qualified tax professional.
Should I buy, finance, or lease solar panels?
Buying with cash generally produces the best lifetime economics because you own the system, keep any state or utility incentive you qualify for, and pay no interest, but it demands the most money up front. A solar loan spreads that cost over time and can still keep ownership in your name, at the price of interest that lengthens payback. A lease or power purchase agreement usually needs no money down, but the company owns the panels and keeps any state or utility incentive, you pay for the power or the equipment monthly, and many contracts include an annual price escalator that raises what you pay each year. The right answer depends on your cash, your appetite for debt, and how long you will stay, and we walk the trade-offs in Step 4.
What is net metering and why does it matter for going solar?
Net metering is the utility billing arrangement that credits you for the surplus electricity your panels send to the grid, usually during sunny midday hours, which you then draw back at night. Its terms decide a large part of your savings, because a program that credits exports at the full retail rate is far more valuable than one that pays a low wholesale rate or caps how much you can offset. Net metering rules vary by state and utility and have been changing in many places, so confirm your specific program before you size a system, since sizing past what your utility will credit can waste money on panels that export for pennies. This is why Step 6 treats your utility's rules as a design input, not an afterthought.
Can you go solar for free?
No. There is no program, federal or otherwise, that installs free solar panels on private homes. Offers marketed as free solar are almost always a lease or power purchase agreement wearing better clothes: the company installs and owns the array on your roof, keeps any incentives for itself, and you commit to paying monthly for the equipment or its power, often for twenty years or more and often with an annual escalator that raises the payment each year. No money down is a real feature of those deals, but free is not an honest description of them. A no-money-down offer is simply a financing choice, so translate it before you judge it: ask who owns the system, who keeps the incentives, what the payment becomes in the final contract years, and what happens when you sell the home, then compare it against a cash or loan purchase the way Step 4 lays out.
What does solar panel installation involve, step by step?
Solar panel installation on a typical home runs in a fixed order over one to three days on site. The crew walks the roof and marks the layout from the approved plan, locates the rafters, and fastens mounting feet with flashing that seals every roof penetration, then bolts rails across them and clamps the panels down. Wiring follows: module-level microinverters or optimizers if the design uses them, conduit runs down to a string inverter or combiner, then the tie into your main service panel with the disconnects, rapid-shutdown hardware, and labeling your local code requires, plus a main-panel upgrade if the existing one cannot carry the array. The crew finishes by commissioning the inverter and the monitoring so you can see production. Installation is not the finish line, because a building or electrical inspection and then your utility's permission to operate still stand between the finished array and the day you switch it on.
How do you install solar panels, and can I install them myself?
For a grid-tied rooftop system the honest answer is that you generally should not install solar panels yourself, because the work is licensed electrical and structural work almost everywhere, it must pass a building or electrical inspection, and your utility will not grant an interconnection or permission to operate for an unpermitted install. A do-it-yourself array also tends to void roof warranties and equipment warranties, and it puts the roof penetrations, which are the most common source of later trouble, on you rather than on an insured company. What you can and should do is understand the sequence, since knowing how panels are mounted, wired, and tied into your panel is how you judge whether a crew did careful work. Small off-grid projects such as a shed or an RV are a different situation with far lower stakes, but a home array that touches your service panel belongs to a licensed installer.