
What's on this page
- Before you start: what you need
- Step 1: Monitor your system’s production to catch problems early
- Step 2: Keep the panels clean
- Step 3: Inspect for shading, debris, and physical damage
- Step 4: Check the inverter, the part most likely to fail
- Step 5: Watch for hot spots, corrosion, and loose connections
- Step 6: Manage snow, storms, and seasonal issues
- Step 7: Keep records, warranty, and schedule professional checkups
- A worked example: a year of maintenance for one home
- Solar maintenance tasks by frequency
- Why solar production drops
- Common mistakes when maintaining solar panels
- Troubleshooting: when something looks wrong
- Your solar maintenance checklist
- The bottom line
Short answer: Solar panel maintenance is mostly watching, not wrenching, and takes an illustrative few hours a year. The seven-step routine: monitor production monthly so problems show up as numbers, keep the panels reasonably clean, inspect for shade, debris and damage, watch the inverter as the part most likely to fail, leave hot spots and wiring to a professional, manage snow and seasonal swings, and keep monitoring access, warranty documents and a simple log.
Solar panels have a reputation for needing no care at all, and that reputation is almost right, which is exactly why it costs some owners money. Because the panels have no moving parts and rain rinses most of the dust away, it is easy to install a system, watch the first bills fall, and then never look at it again for years. The trouble is that a solar array can quietly underproduce for a long time before anyone notices, whether from creeping shade, a soiled surface, or an inverter that has been throwing a fault code into an app nobody opens. By the end of this field guide you will know the seven light, mostly seasonal habits that keep your system producing what you paid for, and, just as important, which jobs to never touch yourself.
This field guide walks the whole care routine in order: monitor your production so problems show up as numbers, keep the panels reasonably clean, inspect for shade and debris and damage, watch the inverter as the part most likely to fail, leave hot spots and wiring to a professional, manage snow and storms and seasonal swings, and keep your records and warranty and professional checkups on a schedule. It pairs naturally with the decisions you already made when you went solar, so if you are earlier in the journey our go-solar field guide and sizing field guide cover the steps before this one. Open the companion calculator as you read to sanity-check your own system’s output against what it made in year one.
Key takeaways
- Solar maintenance is mostly watching, not wrenching: monitoring your production is the single highest-value habit, because it turns a quiet problem into a visible number.
- Your active time is small, an illustrative few hours a year, and much of the routine is seasonal glances at the array and the app rather than hands-on work.
- The inverter, not the panels, is the component most likely to need service over the decades, so its fault lights and error codes deserve your attention.
- Do the monitoring and light cleaning yourself, but never do electrical work: an array carries live voltage even when the grid is off, and do-it-yourself electrical can be fatal and can void your warranty.
- Keep your monitoring access, warranty documents, and a simple maintenance log, because catching and reporting a fault in time is what protects the return you already paid for.
Before you start: what you need
This field guide is a maintenance habit, not a repair manual, so the tools are mostly information and a little safety sense. Before you begin the routine, gather three things: access to your system’s monitoring, a clear-eyed view of what is safe for you to do yourself, and the warranty paperwork from your install. With those in hand, the seven steps below become a light seasonal rhythm rather than a project, and none of them asks you to become an electrician.
Gather these before Step 1:
- Access to your production monitoring. Find the app, web portal, or inverter display that reports how much electricity your system makes, and confirm your login works. This is the instrument that makes every other step easier, because it lets a problem announce itself instead of hiding. If you never set it up at install, that is the first thing to fix.
- An honest safety line for yourself. Decide in advance that you will not climb onto a steep, high, or wet roof, and that you will not open the inverter or touch any wiring. Nearly all safe homeowner maintenance happens from the ground or a stable position, using your eyes and, at most, a soft brush on a pole.
- Your warranty and install documents. Dig out the panel, inverter, and workmanship warranties, the written production estimate from your quote, and your installer’s contact details. Step 7 leans on these, and a claim is far easier when the paperwork is already in one place.
Difficulty is low, and most steps take minutes, not hours. What matters is consistency, not effort: a system checked lightly every season stays healthy, while one installed and forgotten can lose production for years unnoticed. The whole routine adds up to an illustrative few hours across a year. With monitoring access, a safety line, and your documents ready, the seven steps below turn a quiet rooftop process into something you can actually keep an eye on.
Step 1: Monitor your system’s production to catch problems early
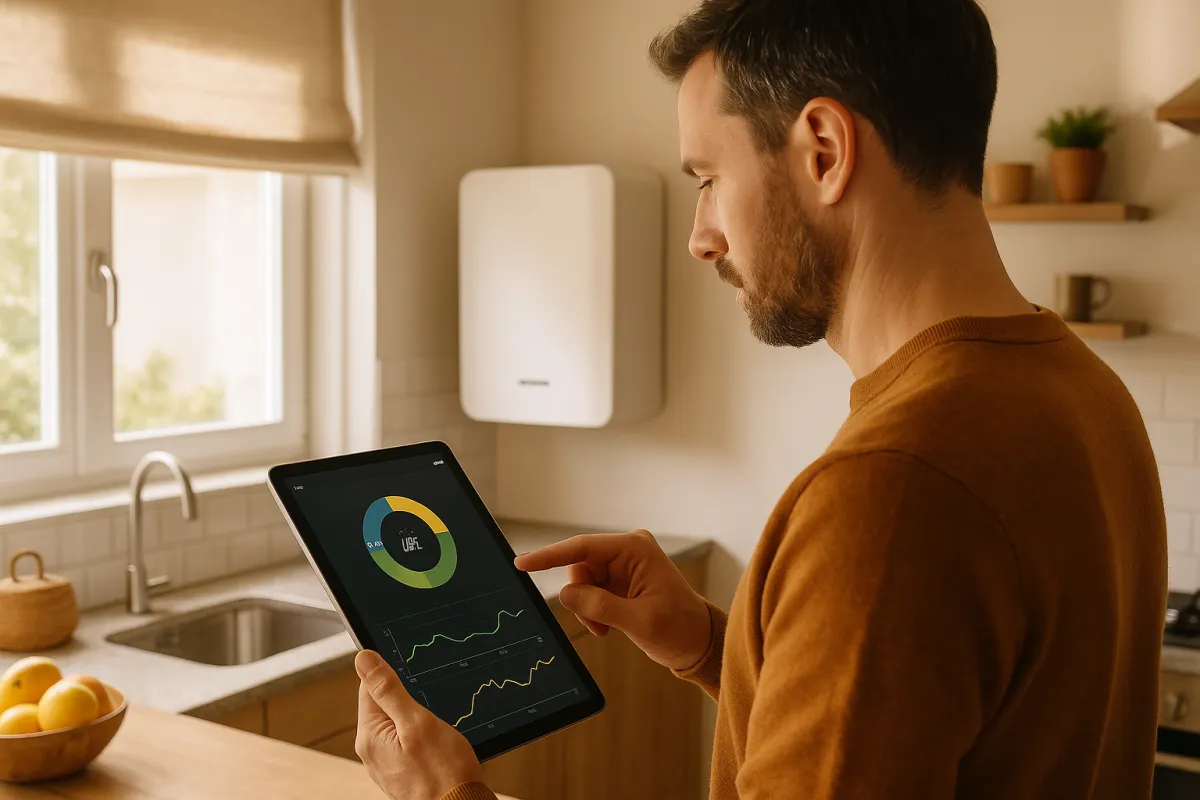
Start every maintenance routine at the monitoring, because production data is the one instrument that makes an invisible rooftop process visible. Your system reports how much electricity it makes through an app, a web portal, or the inverter’s own display, and checking it is the single highest-value habit you have. The reason is simple: a solar array gives almost no physical sign when it underperforms. Panels do not squeak or leak when they are shaded or a string has dropped offline. The number in the app is often the only symptom, so an owner who never opens it can lose real production for months without a clue.
Make it a monthly glance, not a daily obsession. Because output rises in long sunny summer days and falls in short cloudy winter ones, the raw figure means little on its own. What you are looking for is a pattern break: compare this month against the same month a year ago, and a bright day against past bright days. A healthy system tracks its own history and the written production estimate from your quote. A sudden drop, a panel or string reading zero, or a persistent shortfall below that estimate is your cue to investigate, working through the later steps or calling your installer.
As an illustrative example, suppose your system made about 9,800 kilowatt-hours in its first year. If a later year comes in near 9,700 you are seeing normal, tiny degradation, but if a summer month reads a third below the same month last year on similar weather, something is wrong, whether new shade, soiling, or an inverter fault. Watch out for systems without panel-level monitoring, where one failed panel hides inside the total. If your only signal is the utility bill, an unexplained rise is the coarse version of the same alarm. Run your own year-one figure through the companion calculator to set the baseline every later reading is measured against.
Step 2: Keep the panels clean
Cleaning is the maintenance task people picture first and overrate most, because for many systems rain does the job. Panels are tilted glass, and a good rain rinses off the light dust and pollen that settle between storms, so in wetter climates dedicated cleaning barely moves production. Cleaning earns its keep in narrower cases: long dry spells, heavy pollen or agricultural dust, nearby construction, bird droppings that rain does not shift, and shallow-tilt arrays where grime settles instead of washing away. The honest trigger is your data from Step 1. If output drifts below similar sunny days and the glass looks visibly dirty, a cleaning is worth considering.
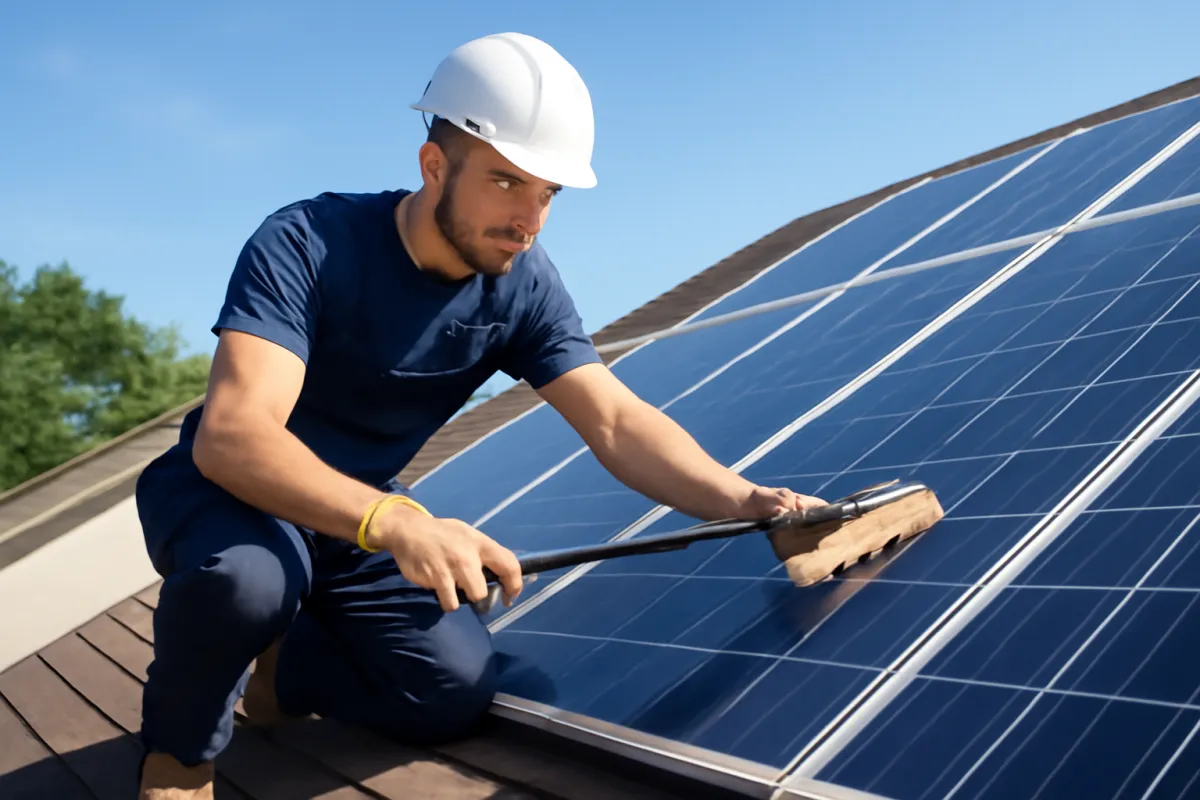
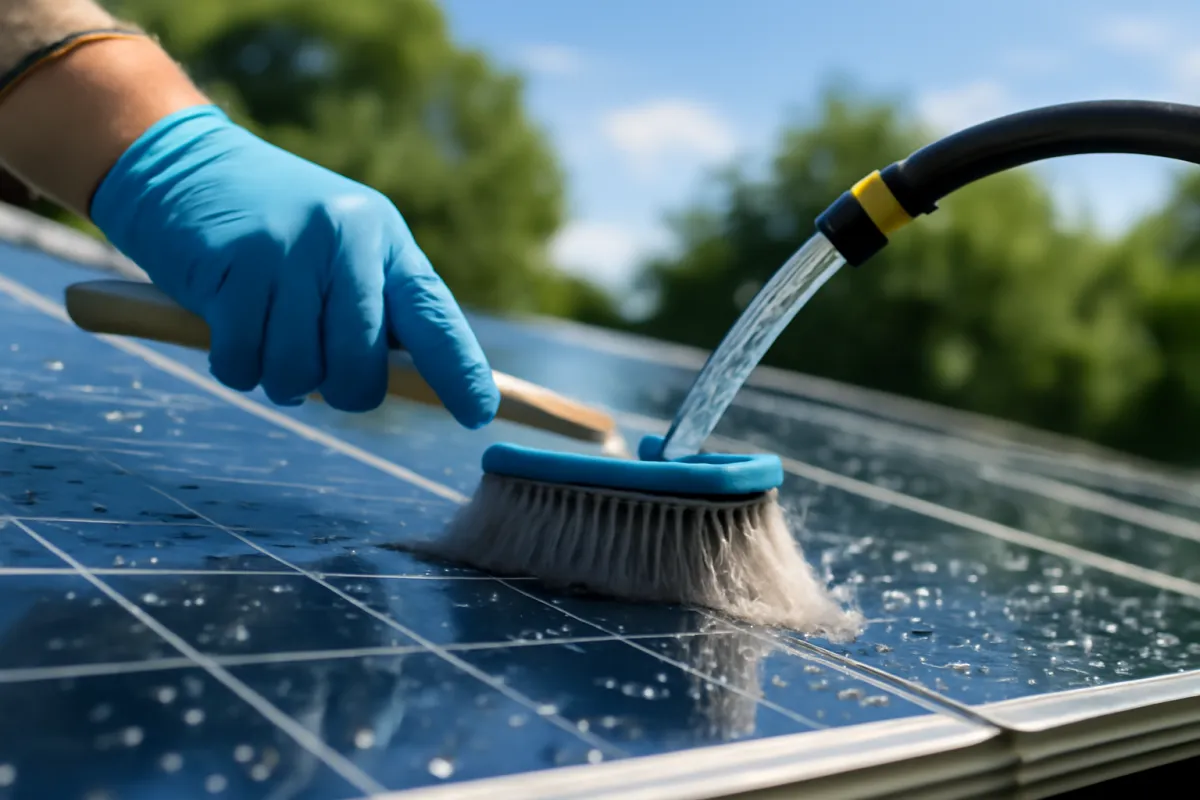
When you do clean, safety outranks the few percent of production at stake. The gentlest effective method is plain water and a soft brush or squeegee on an extension pole, ideally reaching accessible panels from the ground, in the cool of early morning or evening so cold water never hits hot glass. Avoid abrasive pads, harsh detergents, and above all pressure washers, which can force water past the panel seals and cause damage that no warranty covers. Never walk on the panels themselves, and never climb a steep or wet roof to chase a light film. If the array is high, steep, or heavily soiled, a professional cleaning in the low hundreds of dollars, as an illustrative figure, is cheaper than a fall.
Timing matters more in some seasons than others. Winter is a special case, because snow both blocks and, as it melts and slides off tilted panels, helps rinse them, which our note on how solar panels work in winter explains in detail. Watch out for the classic overreaction of scrubbing panels every few weeks; frequent cleaning of already-clean glass adds risk and effort for a gain your monitoring will not even register. As an illustrative rule, once or twice a year is plenty for most rooftop systems, and your production data, not a calendar, should tell you when that becomes once or twice more.
Step 3: Inspect for shading, debris, and physical damage
Between cleanings, give the array a plain visual inspection a few times a year, because your eyes catch things a production number only hints at. This is a ground-level look, not a climb. Stand back where you can see the whole array, ideally around midday when the sun is high, and scan for three things: new shade, accumulated debris, and visible damage. Each is a common, avoidable cause of lost output, and each is far cheaper to fix when you spot it early than after a season of quiet underproduction.
Shade is the sneakiest, because it grows. The tree that cleared your roof at install keeps growing, and a few years of new branches can throw an afternoon shadow across panels that used to run clean. Note where shadows fall during the productive midday hours across the seasons, since the sun sits lower in winter and lengthens every shadow. A branch worth trimming is one that shades panels when the sun is doing its heaviest work. Debris is the simple one: leaves, twigs, seed pods, and windblown litter pile at the lower edge of an array or in valleys, and birds love the sheltered space beneath panels, where nests block airflow and droppings soil the glass. Clear what you can safely reach, and consider critter guards if birds are a recurring problem.
Damage is rarer but matters most. Scan for cracked or clouded glass, a panel with a scorched or discolored patch, lifted or corroded mounting hardware, and any conduit or wiring that has pulled loose or frayed. As an illustrative habit, add a closer look after any hailstorm, high wind, or heavy ice, since that is when physical harm arrives. Watch out for treating a visual all-clear as proof the system is fine; shade and soiling can rob production while everything looks intact, which is why this step works with Step 1, not instead of it. Anything electrical you notice here, a burn mark or a loose connector, is a note to call a professional, never to touch, which leads into the next steps.
Step 4: Check the inverter, the part most likely to fail
If you learn one thing about solar maintenance, make it this: the inverter, not the panels, is the component most likely to need attention over your system’s life. Panels are sealed, simple, and warrantied for decades, losing only a small fraction of their output per year, a story our note on how long solar panels last tells in full. The inverter does the constant, harder work of converting the panels’ direct current into the alternating current your home and grid use, and that electrical duty, plus heat and more complex electronics, is why a string inverter is commonly expected to be replaced at least once during a panel array’s service life. Knowing where the weak link sits tells you where to point your attention.
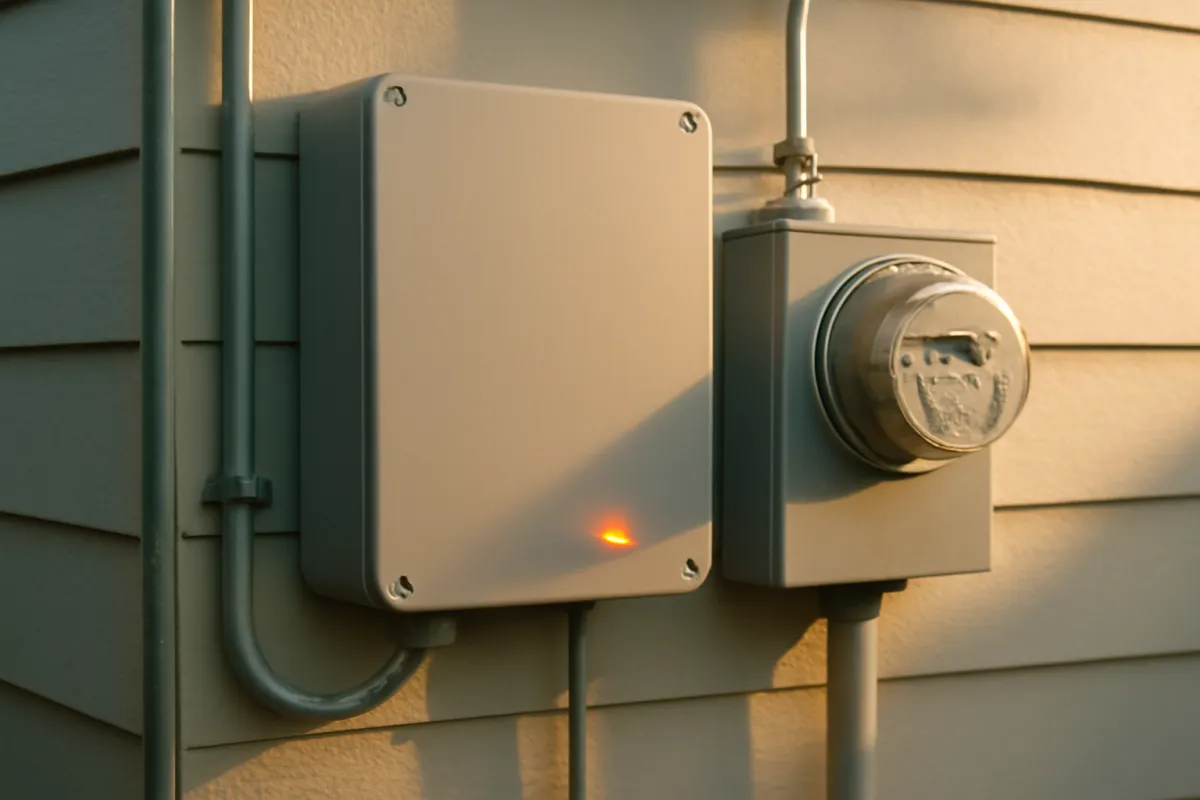
Checking the inverter is a look, not a repair. Find the unit, usually mounted on a wall in a garage, basement, or shaded exterior spot, and observe its status indicator. Most inverters show a light or a display: a steady signal or a green light typically means normal operation, while a red or amber light, a blinking pattern, or an error code means it wants attention. Your monitoring app from Step 1 usually surfaces the same faults as codes or alerts, often before you would spot the light. Note whether the unit is clean, ventilated, and not baking in direct afternoon sun, since heat shortens inverter life, and make sure nothing has been stacked against it that blocks airflow.
What you do not do is open it. The inside of an inverter carries dangerous voltage, and the array feeding it stays live in daylight even when the grid is off, so the correct response to any fault light or persistent error is to note the code and call your installer or a licensed technician, not to investigate with a screwdriver. As an illustrative pattern, a fault caught early through monitoring often means a covered warranty repair or a clean replacement, while the same fault ignored can mean weeks of a dead system before the next bill reveals it. Watch out for dismissing a blinking light as a quirk; on the component most likely to fail, an alert is a message worth acting on.
Step 5: Watch for hot spots, corrosion, and loose connections
Some maintenance is purely about knowing when to stop and call a professional, and this step is that boundary drawn clearly. A solar array is an electrical system on your roof, and a handful of warning signs point to electrical problems that you observe but never touch: hot spots, corrosion, and loose or damaged connections. Learning to recognize them from a safe distance is valuable, because these are the faults that, left alone, can degrade production, damage equipment, or in rare cases start a fire. Learning to leave them to a licensed technician is what keeps you safe and keeps your warranty intact.
Know the signs without seeking to fix them. A hot spot is a small area of a panel that runs far hotter than the rest, often from a cell fault, a shaded cell working against its neighbors, or a bad connection, and it can show as a scorched or discolored patch on the panel you might notice during the Step 3 inspection. Corrosion appears as rust or a white powdery buildup on mounting hardware, grounding points, or connectors, usually where moisture has crept in, and it slowly degrades both structure and electrical contact. Loose connections can reveal themselves as a burnt smell, a melted or discolored connector, scorch marks near junction boxes, or intermittent production dips in your monitoring. Any of these is a reason to call, promptly.
Here is the rule with no exceptions: do not do solar electrical work yourself. The array carries live direct-current voltage whenever the sun is up, even during a grid outage, and direct-current arcs are especially dangerous, so a well-meaning attempt to tighten a connector or clear corrosion can cause serious injury and will likely void your warranty. As an illustrative response, treat any of these signs the way you would a gas smell: note it, keep clear, and get a qualified professional out. Watch out for online guides that walk you through opening junction boxes or reseating connectors; the money saved is never worth the risk on a live rooftop array. Your job in this step is to be the early-warning system, not the repair crew.
Step 6: Manage snow, storms, and seasonal issues
Weather is the part of maintenance that arrives on its own schedule, so the routine here is seasonal readiness rather than a fixed monthly task. Panels are built to survive rain, wind, hail, and snow loads, but seasonal extremes still shape both your production and the occasional hands-on job, and knowing the sensible response to each keeps you from either ignoring a real problem or overreacting to a harmless one. The guiding principle stays the same as the rest of this field guide: act from the ground, protect your safety, and let your monitoring tell you whether the weather actually cost you anything.
Snow is the season that tempts people onto the roof, and it rarely should. Panels are dark, tilted glass, so they shed snow as they warm and the sun returns, and a light cover often clears itself within a day or two, with the meltwater rinsing the glass on its way off. When a heavy cover lingers on an accessible low-slope array and you want the production back, a plastic-bladed roof rake used from the ground is the safe tool, never a metal shovel that scratches the glass and never a climb onto a snow-covered roof. Our note on how solar panels work in winter covers why a snowy month underproducing is usually normal, not a fault. Watch out for panicking over a few snowy days; the annual production hit from snow is often smaller than it looks.
Storms are about before and after. Before severe weather there is little to do beyond trusting the install, but afterward, add the closer inspection from Step 3: scan for cracked glass, lifted panels or racking, and any wiring knocked loose by wind or a fallen branch. Hail is the classic damage event, and panels are hail-rated but not hail-proof, so a major storm is a reason to check both the glass and your monitoring for a sudden drop. As an illustrative habit, photograph any storm damage promptly and report it, because a timely record is what turns damage into a covered claim rather than an argument. Heat has its own quiet effect: very hot days actually lower panel efficiency, so a small summer dip is physics, not a fault.
Step 7: Keep records, warranty, and schedule professional checkups
The last step is the one that protects all the others, and it is pure paperwork and habit. Solar maintenance is only as valuable as your ability to act on what you find, and that turns on three things: keeping your warranty and install documents where you can find them, logging what you observe over time, and scheduling the occasional professional checkup so a trained eye catches what a ground-level glance cannot. None of this touches the hardware. It is the administrative layer that turns a noticed fault into a covered repair and a vague worry into a documented trend.
Start with the documents. Keep the panel, inverter, and workmanship warranties together, along with the written production estimate from your quote, your installer’s contact details, and the model numbers of your equipment. Warranties differ in length and in what they cover, and most require that the system be kept in reasonable condition and that repairs be done by qualified people, so knowing the terms before a problem arises is what lets you claim rather than pay. Alongside them, keep a simple maintenance log: a few lines each season noting your production reading, any cleaning, and anything you inspected. Over years, that log is what makes a slow decline or a recurring fault obvious.
Then schedule the professional layer. As an illustrative rhythm, many owners have a licensed technician inspect the full system every few years, and sooner if monitoring flags something or after a major storm. A professional can safely check torque on connections, test the inverter and electrical performance, and inspect the parts of the roof and array you cannot safely reach, for a cost commonly in the low hundreds of dollars as an illustrative figure. Watch out for two paperwork failures that quietly cost the most: letting warranty registration or documents go missing, and doing or hiring unpermitted electrical work that voids coverage. Keep the records, respect the warranty terms, and book the occasional pro, and the six watching-and-cleaning steps before this one turn into real, protected production.
A worked example: a year of maintenance for one home
Follow one household through a full year of care to see how light the routine really is. The Nguyen family owns an illustrative 7 kilowatt rooftop system, about 18 panels, that made roughly 9,800 kilowatt-hours in its first year, a figure they wrote down as their baseline. Their whole maintenance plan is the seven steps on a seasonal rhythm, and across the year their hands-on time adds up to only a few hours. The point of the example is not the exact numbers, which are illustrative, but the shape: mostly watching, a little cleaning, and one modest planned expense.
In winter they mostly leave the array alone, letting light snow shed itself, and once use a plastic roof rake from the ground to clear a heavy cover off the lower panels. Their monitoring shows a low but normal winter output, so they do not worry. In spring, heavy pollen coats the glass and their production dips below similar sunny days from last spring, so they rinse the accessible panels with a hose and a soft brush one cool morning, at no cost but an hour of time, and output recovers. Each season they spend a few minutes in the monitoring app comparing the month against a year earlier, and a few minutes eyeing the array for new shade and debris, trimming one branch that had begun shadowing an afternoon corner.
Summer brings the one real event: the app flags an inverter fault code on a hot afternoon. Because they catch it the same week rather than months later, a call to their installer resolves it under warranty at no cost, with only a couple of days of lost production instead of a dead system feeding a surprise bill. In fall they clear leaves from the array’s lower edge and, following their every-few-years rhythm, pay a licensed technician for a full inspection at an illustrative couple hundred dollars, which confirms the connections and mounting are sound. Their year-end tally: a few hours of attention, one modest professional bill, a fault caught early for free, and a system still producing in line with its baseline. Run your own system size and year-one output through the companion calculator to set the baseline your seasons are measured against.
Solar maintenance tasks by frequency
It helps to see the routine laid out by how often each task actually comes up, because the tasks you do most are the cheapest in effort, and the rare ones are the ones worth scheduling so they do not slip. Monitoring is a monthly glance, seasonal inspection happens a few times a year, cleaning and storm response are occasional and weather-driven, and a professional checkup is a rare, planned event. Reading the frequencies together shows why solar care feels so light: the high-frequency tasks take minutes, and the effortful, hands-off work happens seldom.
Solar maintenance tasks by frequency
Illustrative times per year for a typical rooftop system. Bars scale to the most frequent task.
Bar widths track each task's illustrative frequency against the monthly monitoring habit (12 per year is 100%, so 4 per year is 33%, 2 per year is 17%, 1 per year is 8%, and roughly once in five years is about 2%). The lesson: the tasks you repeat most cost the least effort, so build the monitoring habit first.
Read across the bars and the strategy is obvious. Put the habit where the frequency is highest, in the monthly monitoring glance, because that is where problems surface, and let the rarer tasks run on the weather and the calendar. An owner who nails the cheap, frequent watching rarely needs an expensive surprise from the rare, effortful end of the chart.
Why solar production drops
When your monitoring shows output falling faster than the slow, normal fade of age, the cause is almost always one of a short list, and knowing the usual suspects tells you which step to work through. Soiling and shade are the common, fixable culprits you handle yourself in Steps 2 and 3. Inverter faults are the mechanical cause you catch in Step 4 and hand to a professional. Natural degradation is the slow, unavoidable background, and a small remainder is everything else, from wiring to weather. Seeing their rough shares helps you diagnose a drop instead of guessing.
Why solar production drops
Illustrative share of avoidable and natural production loss, by cause. Sums to 100%.
Illustrative shares of the causes behind a production drop, not measured data. Because dirt and shade together make up more than half, and both are things you can spot and fix from the ground, most underproduction is addressable before you ever need a technician for the inverter slice.
The takeaway is encouraging: the two largest slices, soiling and shade, are exactly the ones you can diagnose and fix yourself with a hose and a pair of loppers, while the inverter slice is the one where your job is to notice and call. Only the age slice is out of your hands, and it is slow. A drop is a puzzle with a short answer key, and this field guide is that key.
Common mistakes when maintaining solar panels
The same handful of errors accounts for most solar-maintenance regret, and each one is avoidable with a habit rather than a skill.
- Never checking production. The most expensive mistake is the quietest: installing a system and never opening the monitoring, so a shaded array or a dead string underproduces for months with no symptom but a number nobody reads. A monthly glance is the whole fix.
- Cleaning the roof unsafely. Chasing a few percent of production by climbing a steep or wet roof, or by walking on the panels, trades a tiny gain for a real fall risk. Clean from the ground with a pole, or pay a professional, and never use a pressure washer or harsh chemicals that can breach the seals.
- Ignoring inverter warnings. A fault light or an error code on the component most likely to fail is a message, not a quirk. Dismissing it can turn a quick warranty repair into weeks of a dead system and a surprise bill.
- Doing electrical work yourself. Opening the inverter, reseating connectors, or clearing corrosion on a live array can be fatal, because the panels carry direct-current voltage whenever the sun is up, even during an outage. This work is for a licensed professional, always.
- Voiding the warranty by accident. Using abrasive tools or a pressure washer, hiring unlicensed help, doing unpermitted electrical work, or letting warranty documents go missing can all erase coverage you paid for, turning a would-be free repair into an out-of-pocket cost.
- Overreacting to normal seasonal dips. Panicking over a snowy or short winter month, or a hot-day summer dip, and scrubbing already-clean glass every few weeks, adds effort and risk for no measurable gain. Let your data, not your worry, decide when to act.
Avoid these six and your maintenance stays what it should be: light, safe, and effective, protecting the production you already paid for rather than putting it, or you, at risk.
Troubleshooting: when something looks wrong
What if your production suddenly drops? First, rule out the sky, since a run of cloudy days or a seasonal shift lowers output for perfectly normal reasons, so compare against the same period last year rather than last week. If the drop persists on sunny days, work down the causes: look for new shade or heavy soiling you can fix yourself from Steps 2 and 3, then check the inverter for a fault light or code from Step 4. A single panel or string reading zero in panel-level monitoring points to a hardware or connection fault, which is a call to your installer, not a job for you. If you have no panel-level data, an unexplained jump in your electricity bill is the same alarm arriving late.
What if the inverter shows a fault light or error code? Note the exact code and the color or blink pattern, check whether your monitoring app describes it, and contact your installer or a licensed technician. Do not open the unit or attempt a reset beyond any simple power-cycle the manufacturer’s own documentation explicitly permits. Because the inverter is the part most likely to fail, an early call often means a repair or replacement under warranty and only a short gap in production, whereas waiting can mean the system sits dead until a bill gives it away.
What if birds are nesting under the panels? The sheltered gap beneath a rooftop array is attractive to birds and pests, and nests block airflow, soil the glass with droppings, and can chew wiring. Clear debris you can safely reach, and for a recurring problem consider critter guards or mesh installed around the array perimeter, a job a professional can do without disturbing the panels. Do not pull at wiring while clearing a nest, and never climb an unsafe roof to reach one.
What if hail or a storm may have damaged the panels? After any major hail, wind, or ice event, add the closer inspection from Step 3 and check your monitoring for a sudden drop. Photograph any cracked glass, lifted panels, or loose wiring promptly and thoroughly, then contact your installer and, if the damage is significant, your homeowners insurer, since a timely, documented record is what turns storm damage into a covered claim. Keep clear of any damaged wiring, treat a hail-struck array as potentially compromised until a professional confirms otherwise, and let the paperwork from Step 7 do the arguing for you.
Your solar maintenance checklist
Use this as the save-and-act summary. Work it as a light seasonal rhythm and you will keep your system producing what it should with only a few hours of attention a year.
- Confirm your production monitoring access works, and glance at it monthly, comparing each month against the same month last year.
- Note your year-one production as the baseline every later reading is measured against, and check it in the calculator.
- Inspect the array from the ground a few times a year for new shade, debris, bird nests, and any visible damage.
- Clean the panels once or twice a year only when data and a dirty surface justify it, using plain water and a soft brush from the ground, never a pressure washer or a risky climb.
- Check the inverter's status light and your app for fault codes, keep the unit ventilated and out of harsh sun, and never open it.
- Learn the signs of hot spots, corrosion, and loose connections, and call a licensed professional rather than touching any electrical fault.
- Let light snow shed itself, use a plastic roof rake from the ground for heavy cover, and inspect and photograph after major storms.
- Keep your panel, inverter, and workmanship warranties, production estimate, and installer contacts together, and log what you observe each season.
- Schedule a professional inspection every few years, and sooner if monitoring flags a fault or after severe weather.
- Above all, do the watching and light cleaning yourself, and leave every electrical task to a qualified professional.
The bottom line
Maintaining solar panels is less a chore than a light habit, and the whole of it fits in a sentence: watch your production, keep the glass reasonably clean, inspect from the ground, mind the inverter, leave the electricity to a professional, respect the weather, and keep your records. The panels themselves ask almost nothing of you, which is exactly why the real risk is neglect rather than wear. A system checked lightly every season keeps producing what you paid for, while one installed and forgotten can lose output for years before a bill finally raises the alarm.
The figures throughout, an illustrative 7 kilowatt system near 9,800 kilowatt-hours in year one, a professional checkup in the low hundreds of dollars, and a few hours of attention across the year, are teaching examples, not measurements of your home, and your own system, climate, and equipment will move every one. Set your baseline in the companion calculator, build the monthly monitoring habit first, and let the rarer cleaning, inspection, and professional checkups run on the weather and the calendar. Do that, and the return you worked out back when you first read our go-solar field guide stays protected for the long life of the array.
WattBarn publishes this field guide to help you keep an eye on your own solar system, not to serve as electrical, engineering, or safety advice. The production figures, dollar amounts, task frequencies, and maintenance timelines above are illustrative examples chosen to teach the seven-step routine, not measurements or quotes for your home, and your real system, climate, roof, equipment, and warranty terms will produce different numbers that change over time. Solar arrays carry live voltage and any electrical inspection or repair should be left to a licensed professional, so treat this as a guide to watching and light care only, and let your installer’s guidance, your equipment manuals, and your own warranty documents, rather than these worked sketches, govern what you actually do to your system.
Frequently asked questions
Do solar panels really need maintenance?
Solar panels need far less maintenance than most homeowners expect, because the panels themselves have no moving parts and rain does most of the cleaning, but low maintenance is not the same as no maintenance. The work that matters is mostly watching, not wrenching: checking your production monitoring so a quiet problem shows up as a number, glancing at the array a few times a year for new shade or debris, keeping the panels reasonably clean where rain does not, and letting a professional handle anything electrical. The single component most likely to actually need service over the decades is the inverter, not the panels. Treat maintenance as a light, mostly seasonal habit rather than a chore, and an illustrative rooftop system can run for years with only a few hours of your attention a year.
How often should I clean my solar panels?
For most rooftop systems, cleaning once or twice a year is plenty, and in many rainy climates the rain keeps the glass clean enough that dedicated cleaning barely moves production. Cleaning matters more where rain is scarce, where pollen, dust, or bird droppings build up, or where the panels sit at a shallow tilt that lets grime settle instead of washing off. The honest test is your production data: if output is drifting below what similar sunny days used to make, and the glass looks visibly dirty, a cleaning is worth it. Never risk a fall to chase a few percent, though. A soft brush and plain water from the ground, or a professional cleaning, is safer than climbing a wet roof, and the illustrative gain from cleaning lightly soiled panels is usually small.
Can I clean and maintain solar panels myself?
You can safely do the watching and light cleaning yourself, but you should not do anything electrical yourself. Reading your monitoring app, checking the array from the ground for shade and debris, rinsing accessible panels with plain water and a soft brush, and clearing light snow with a roof rake are all reasonable homeowner tasks when you can do them without climbing onto a steep or wet roof. Anything involving the inverter's internals, the wiring, the connectors, or the main electrical panel is a job for a licensed professional, because solar arrays carry live direct-current voltage even when the grid is off and a mistake can be fatal or can void your warranty. The safe rule is simple: you monitor and clean, a pro touches the electricity.
What part of a solar system is most likely to fail?
The inverter is the component most likely to need attention over a system's life, not the panels. Panels are simple, sealed, and warrantied for decades, and they typically lose only a small fraction of their output per year, while the inverter does the constant electrical work of converting direct current to the alternating current your home uses and carries more complex electronics. A string inverter is commonly expected to be replaced at least once during a panel array's service life, though the exact timing varies widely by brand, model, heat exposure, and luck. Watching for inverter fault lights and error codes in your monitoring app, and keeping the unit shaded and ventilated where possible, is the highest-value maintenance habit you have, which is why it gets its own step in this field guide.
How do I know if my solar panels are working properly?
Your production monitoring is the answer, because it turns an invisible rooftop process into a number you can check. A healthy system produces more in long sunny summer days and less in short cloudy winter ones, so the question is never the raw daily figure but whether output tracks the pattern of similar days and seasons. Compare this month against the same month last year, and compare a bright day against past bright days. A gradual, small decline over many years is normal degradation, but a sudden drop, a panel or string reading zero, or a persistent gap below the written production estimate from your install is a signal to investigate. If your system lacks panel-level monitoring, an unexplained rise in your electricity bill is the coarse version of the same alarm.
Does maintaining solar panels cost a lot of money?
For most homeowners, ongoing solar maintenance costs little, because the core habits, checking the app and glancing at the array, are free, and the occasional cleaning or professional checkup is modest and infrequent. As illustrative figures only, a professional cleaning or an inspection might run in the low hundreds of dollars when you choose to pay for one, and many years pass with no spending at all beyond your own time. The larger, rarer cost is a component that actually needs replacing, most often the inverter well into the system's life, which is exactly why keeping your warranty documents and monitoring for early faults pays off. Budgeting a small annual amount toward eventual service, rather than assuming zero, keeps a future inverter replacement from feeling like a surprise.
Will cleaning or maintaining my panels void the warranty?
Light, non-invasive care such as reading your monitor, rinsing panels with plain water, and clearing debris will not void a normal warranty, but several do-it-yourself actions can. Opening the inverter, tampering with wiring or connectors, using abrasive tools or harsh chemicals or high-pressure washers on the glass, or hiring an unlicensed person to modify the system can all jeopardize coverage, and so can walking on the panels themselves. Warranties also usually require that you keep the system in reasonable condition and that repairs be done by qualified people. Before you or anyone else touches the hardware, it is worth reading the panel, inverter, and workmanship warranty terms you received at install, because the whole point of keeping those documents, covered in Step 7, is to protect a benefit that a careless afternoon can erase.
How long do solar panels last if I maintain them?
Well-kept rooftop panels commonly last a long time, often cited in the range of a couple of decades or more of useful service, with output slowly declining rather than stopping outright, and maintenance is more about protecting production and catching faults than extending that basic lifespan. Our companion note on how long solar panels last works through the degradation and warranty picture in detail. What good maintenance really buys you is fewer surprise losses along the way: a shaded or filthy array quietly underproducing for years, an inverter fault left unnoticed, or storm damage that a warranty would have covered if you had caught and reported it in time. Think of maintenance as protecting the return you already paid for, not as prolonging a countdown.